Export & Publish
The Export and Publish features let you package a course for distribution outside the editor.
Use Export when you want a downloadable file (SCORM or HTML). Use Publish when you want to push the course directly to a connected LMS integration.
Export
Export creates a downloadable package of your course. You can choose between two export types: SCORM 1.2 or HTML.
Export types
SCORM 1.2
SCORM 1.2 exports follow the SCORM standard and are typically used for uploading a course to an LMS that supports SCORM.
For more about the standard, see: ADL – SCORM
HTML
HTML exports create a pure HTML version of the course. This option does not track or store learner progress anywhere.
However, course behavior still works as expected during playback (for example: completion requirements, required or mandatory pages, and locked navigation).
The key difference is that progress is never saved to an LMS.
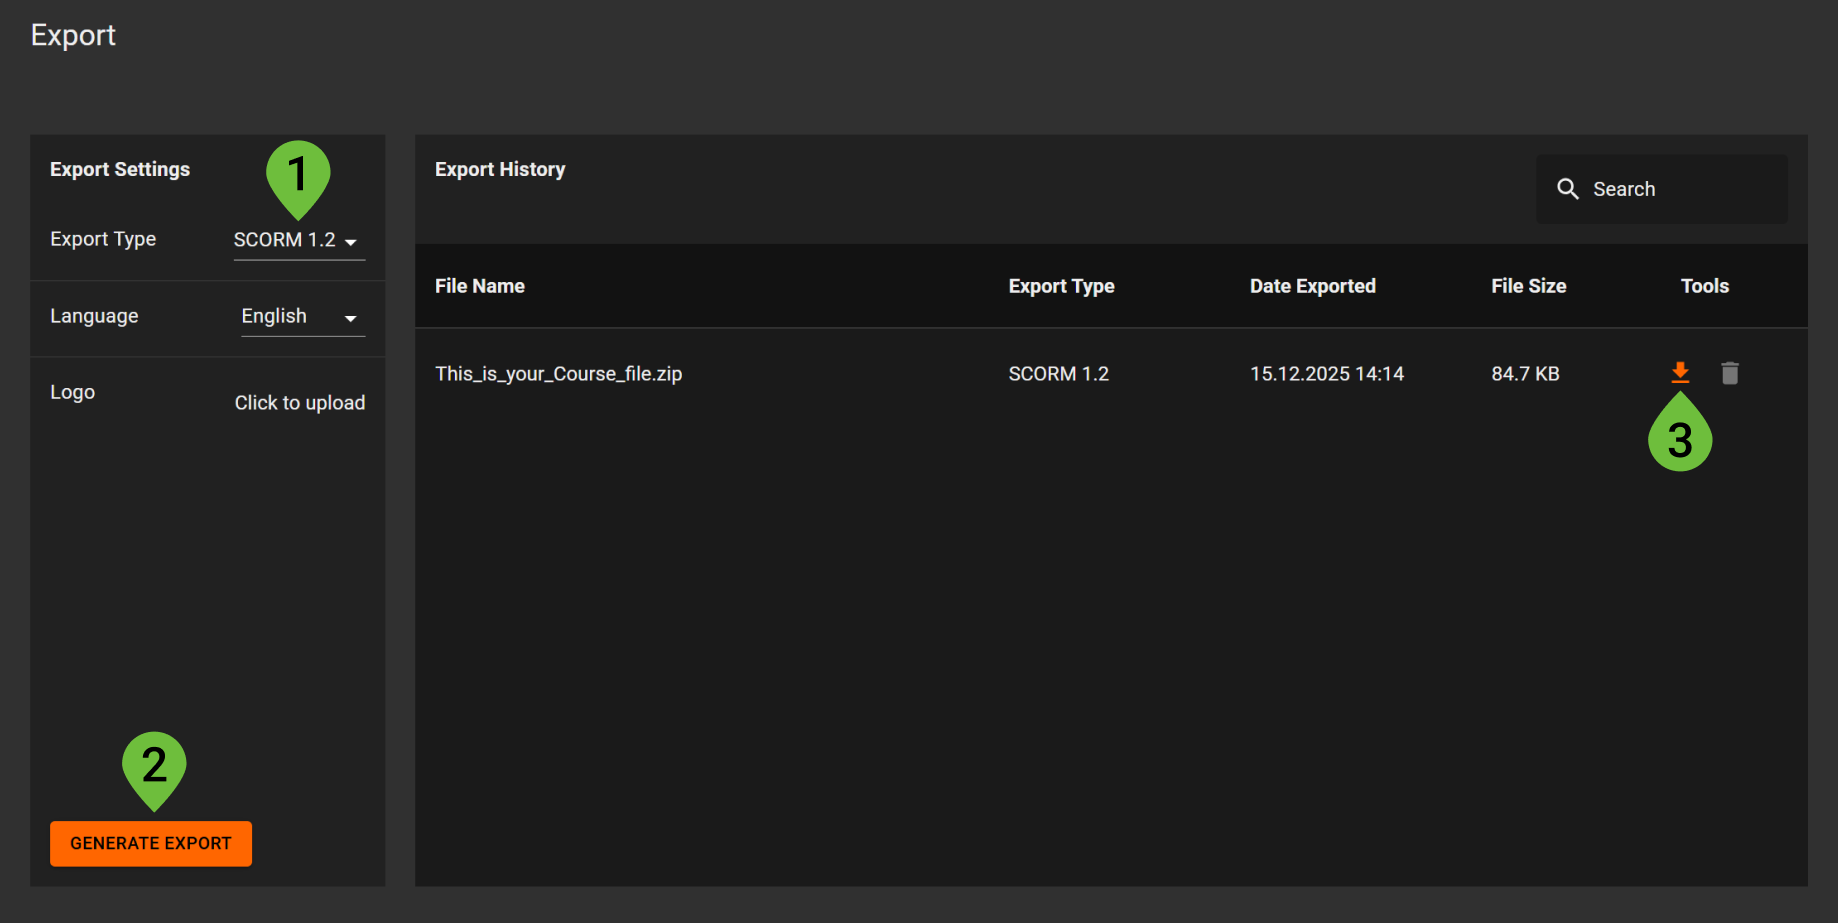
Export settings
On the Export page, you can configure:
- Export Type – Choose SCORM 1.2 or HTML
- Language – Select the language for the exported course
- Logo – Upload a logo to include in the exported player (optional)
How to generate an export
- Open your course and go to Export in the left menu.
- Choose an Export Type (SCORM 1.2 or HTML).
- Select Language.
- (Optional) Upload a Logo.
- Click Generate Export.
Export history
After generating an export, it will appear in Export History. From here you can:
- Download an export package
- Delete an export package when it is no longer needed
If you change course content or settings, generate a new export to ensure the downloaded package includes the latest updates.
Publish
Publishing sends a course directly to a connected LMS integration. This is useful when you want to update an LMS course without manually uploading files.
Before you can publish
To publish, you must first create an integration with either:
- Mentorkit Classic LMS
- Mentorkit WordPress LMS
Reminder: This setup is covered in a separate article:
Integrations (Mentorkit Classic / WordPress) (temp link)
Publish settings
On the Publish page, you can configure:
- Language – Select the language for the published course
- Logo – Upload a logo to include in the published player (optional)
- Linked Integrations – Select which integrations this course should publish to
Link an integration
- Go to Publish in the left menu.
- Under Linked Integrations, click Add Integration.
- Select the LMS integration and the target course or location.
- Save the integration.
Publish the course
- Verify your Publish Settings (Language, Logo, Linked Integrations).
- Click Publish All to publish to all linked integrations.
Publish history
All publish actions are listed in Publish History. This view typically includes:
- LMS Course – The target course in the LMS
- Status – For example: Published
- Date Published – When the publish action occurred
- Tools – Actions related to the publish entry (depending on your setup)