Course Editor
The Course Editor is where you build and edit course content.
To open the Course Editor, select a course from the Course Dashboard and click Edit.
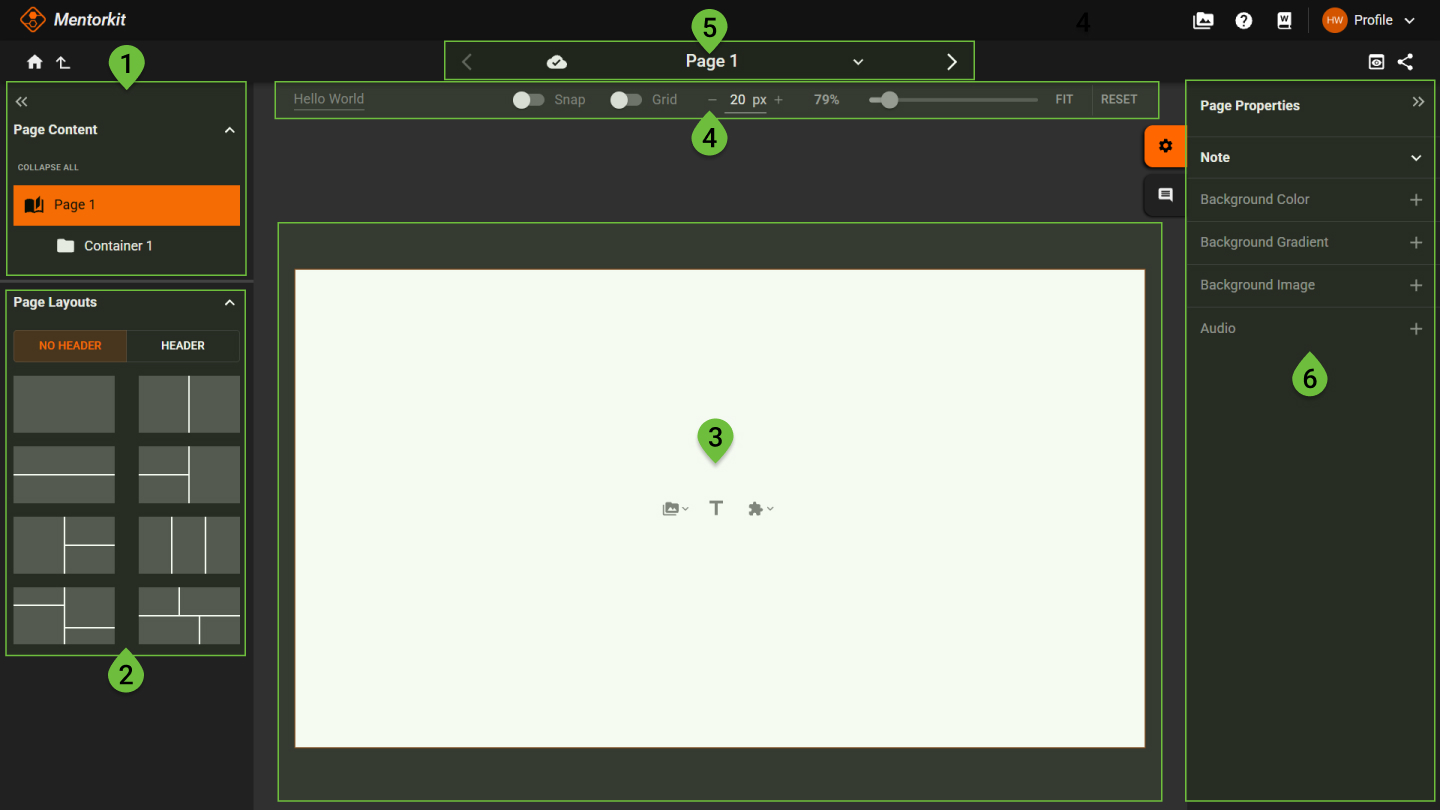
1. Page Content
The left panel displays the content on your page in their containers.
This includes images, tasks, text boxes, and videos.
2. Layouts
The Layouts panel contains available page layouts.
Select a layout to define how containers are arranged on the page.
Layouts can be changed at any time while editing.
3. Canvas
The centre area is the canvas.
This is where you build and preview page content while editing.
Content can be added, moved, and arranged directly on the canvas.
4. Top toolbar
The toolbar contains common editing tools and workspace controls.
This includes options such as:
- Zoom controls
- Grid and snap settings
- Preview
- Sharing
- Media Library
- User menu
5. Navigation bar
The navigation bar at the top of the editor helps you move between pages while editing.
Here you can quickly:
- Navigate between the previous and next page
- Change the page name
- Jump directly to any page in the course
- Add a new page when editing the last page in the course
- Monitor the save status with the cloud server
All changes to the page are saved automatically while you work, as long as you have a stable internet connection.
6. Properties panel
The right panel displays settings for the selected item.
The available settings change depending on what is currently selected.
For example:
- Selecting a page displays page settings
- Selecting a container displays container settings
- Selecting content displays content-specific settings
Most settings in Course Creator are context-based.
Selecting different elements changes the available options in the Properties panel.